Friday, November 13, 2009

Apture - Snapshot tool for your wikis and blogs

Apture allows you to save webpages within your blog or wiki without leaving your site.
First you will need to download the plug in, click on Download Plugin.
Select a blog type and then click on the Install the extension (in this example Firefox)
You will need to open a new post page and the extension will be added.
Follow the instructions to activate the link.
Highlight the text that will open up the Snapshot
Click on the Apture link button
Paste in the URL address for the snapshot, click Go
Choose whether you want an External Link or a snippet then click on Create Link

Hold your mouse over the Link below (don't click) to see the snapshot window

Here is a snapshot of another one of my blogs

Or click on the Apture Embed button, paste in URL and click Go


Wiki Instructions
For a Wiki click on Other Platform and click on Get Started now then Create a Super Embed
Choose from the selections; article, map, audio, document, person, news article, webpage
Type URL address, click Go
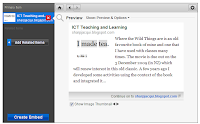


An image will appear of the website.
Click on Create an Embed
Click on Copy this code
Paste into your Wiki Widget.

Monday, November 2, 2009

Textoriser -Textorise your images

Textoriser turns your pictures into words. In this example I have used the text from my ICT Teaching and Learning blog and my avatar.
First download the software from Textorizer, install the software. Upload a picture.

To use your own text, copy the text into a Word/Pages file and save the file as a .txt.
Click on the Change Text and browse to your text file.
There are two choices of Textorizing, the one I prefer using is Textorizer Two.

You will need to play around with the the font scale and text size (drag the blue bars up and down like sliders).
Click on Textorize when finished.
Maximize your screen before taking a Screen Capture

Here is an example of the same graphic with slightly bigger text.

Here is an example of a Picture created in KidPix, saved as a jpeg. The text was typed in Word and saved as a text file. Here are 3 different examples where I have adjusted the font scale, text size and Line height. Click on each example to see the full image.

Wallwisher in the classroom


I have seen Wallwisher used in a few different ways by teachers, which has of course inspired me to write this post and come up with some more ideas of how to use it. So instead of writing the ideas in this post I have added them to the Wallwisher. Please feel free to add but additions are moderated.
If I was using this with students in real time I would not moderate it until later.
You do not have to set up an account, but for classroom use I would as you can save and view all of your walls.
First choose your wall colour and add distinguishing words to the end of your wall URL if you would like to personalise the wall. Click on the options of who is able to view or post notes. If you want to approve the posts click on the check box.
Type in a title for your Wallwisher by clicking on Click here to edit title and do the same for the Subtitle.

Add an Icon Picture to the wall by clicking on Click to select image. Choose one from the ones provided or upload a  picture from your own picture library by clicking on the Browse button.
When you have finished click on the 'done' button in the bottom right hand of the screen.
To add a note, double click on the wall, type in your note which is limited to 160 characters.
You can add links to a website or to a  movie by pasting in the URL at the bottom of the note.

The notes can be moved around and organised.
The notes can only be edited or deleted by the wall owner.
If you have given a unique name to your wall, anybody can view and add to it http://www.wallwisher.com/wall/ineducation but in this case I am moderating the comments.

Hero Machine Version 2.5

Hero Machine Version 2.5 is another Superhero site. This one is very comprehenisive and offers many choices. I particularly like how you can add a companion.


There is also four choices of bodies.


Once you have added all the parts and features to your superhero then you will need to take a screen capture
 Update 3 November 2009
Jeff the Designer left a comment about my post and told me that HeroMachine Version 3.0 is in Alpha mode, it looks amazing, heaps more options. Kids are going to have fun with this one!